

How To Balance Your Vinyl Record Player's Arm

With vinyl making a comeback in the first quarter of the 21st century, interest in vinyl listening equipment has consequently risen, and there are many high-quality turntables on the market for consumers with beginner, intermediate, and advanced knowledge of hi-fi equipment. If you want to make the most of your set-up and get the clearest, strongest sound from your records, we recommend you purchase a turntable with an adjustable tonearm. Properly setting and adjusting your tonearm will allow you to have a better-quality sound, as well as reduce wear and tear on your vinyl records.
While buying a pre-built Crosley or Victrola suitcase record player might be an affordable way to start, the comparatively poor sound quality and degradation of your records will eventually lead any music lover to want more from their prized vinyls. Here is an easy-to-follow guide on how to adjust the counterweight, calibrate the tracking force, and properly balance your player's tonearm.
Adjust the counterweight

The tonearm is the part of the turntable that holds the needle/stylus cartridge at precisely the right height so that the needle drags along the record's grooves. The height is controlled by a counterweight at the rear of the tonearm. If the weight is too light, the needle will sit heavily on the record and wear the inside of the record's grooves. If the counterweight is too heavy, the needle will not sit deep enough in the grooves and will jump and skip, causing interruptions to your listening experience.
To balance the tonearm, place a record on the turntable (if this is your first time, maybe use that $2 copy of "Frampton Comes Alive!" you got from Goodwill to avoid scratching your nice records). Make sure the turntable is on a perfectly flat surface, and turn the anti-skate control to zero if your turntable has that feature. With the cueing lever in the down position, lift the tonearm off its rest so it sits between the disc plate and the platter. Rotate the counterweight clockwise or anticlockwise until the tonearm rests perfectly horizontal with the platter without you holding it. Return the tonearm to the rest and lock it in place.
Calibrate the tracking force
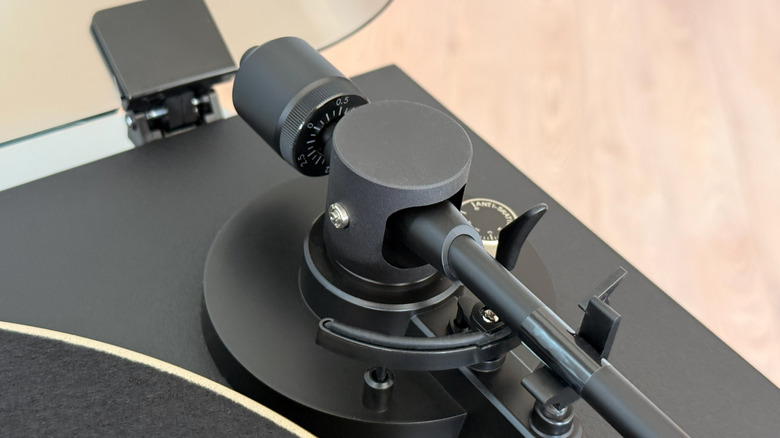
With the tonearm locked in place, hold the counterweight to keep it from moving and turn the number dial to zero. Then turn both the weight and the number dial to the recommended tracking force. The recommended tracking force is associated with your needle cartridge. If you no longer have the packaging/manual of your needle cartridge, look up the model number/serial number from the manufacturer's website to find the recommended tracking force. When you have set the counterweight's tracking force, adjust the anti-skate control to the same value as the counterweight.
The main reason for you to adjust your tonearm is if you replace the needle cartridge, or if you're experiencing the audio quality issues such as skipping. Each cartridge has a different tracking force, and the tonearm will need to be adjusted whenever you replace it. Turntables can last a long time, but they require maintenance and care. Making sure your tonearm is properly calibrated will increase the life of your needle and your vinyl records for years to come.